i-am.ws |
Brightness MacOS Ventura
My Mac Mini M1 from early 2023 came with MacOS Ventura 13.0. After connecting the HDMI to a monitor, the screen was very dark, hardly readable. However the Brightness control keys on the Apple "Magic Keyboard" (F1/F2) didn't work to adjust this.
So I opened System Settings -> Displays and noticed that the Brightness slider was absent. Browsing Apple-Communities I finally found a post from someone running 13.4 who had the same problem. After multiple calls with Apple Support a senior engineer finally told him that this was caused by a bug in Ventura on Mac M1's. And that there was no fix for it, that he had to wait for the next MacOS update.
After reading that, I upgraded my Mac Mini to "latest greatest" :) Ventura 13.6 and thought that that would solve my problems, but half an hour later still no Brightness slider. A further upgrade from Ventura to Sonoma is of course a possibility. Whether that will make the slider and function keys to reappear ... who knows?
Later I saw a post that mentioned that this bug relates to external displays. Therefore the Mac Mini issues. On a MacBook with Ventura, the built-in screen has brightness control, but an added external screen does not.
It's a shame that for seven MacOS updates Apple didn't fix this pretty evident problem !!
Posted at 02:28PM Feb 10, 2024 by WWWillem in Desktop |
PQ PartitionMagic 983
On my Windows XP laptop, the C: drive partition had become too small. So, I freed up some space just after it to grow it to double its size. There are many ways to do that, but my favorite tool is PowerQuest's PartitionMagic. However it failed with an "Error 983 - Too many errors found, process halted.".
Googling that message proved that I wasn't the only one. The solutions ranged from doing a "Disk Cleanup" to running "chkdsk /f". An interesting suggestion was to remove old Restore Points on Microsoft's Support site. I tried all of those, but to no avail. And then there are the many "PC Health" or "Download 983 Repair Tool" ads at the top of the Google page. Everything else failing I opted for one of those, paid thirty bucks and let it do its magic. An hour later I tried Partition Magic again, but error 983 was still there.
While doing all that, I noticed an option in PQ Magic to convert the partition from NTFS to FAT32. That sounded intrusive enough :) that it could fix this 983 error. I went ahead and not surprisingly also that one failed, but now with an "Error 1681 - Data is compressed or sparse.". Researching this on the Symantec support site, suggested to "Turn off System Restore".

You find that option by right clicking "My Computer" (if your Desktop doesn't have a shortcut to My Computer, do this in Windows Explorer) and then click "Properties". Select the "System Restore" tab and enable "Turn off System Restore on all drives". Having done that, I went back to Partition Magic to try the resize operation again (yes, I put my convert to FAT32 on the back burner). Suddenly all went well and two minutes later I had doubled the size of my C: drive.
Posted at 08:43AM Nov 21, 2010 by WWWillem in Desktop |
Alsa Microphone
While trying to install Skype on RedHat Linux, I discovered that although I thought that sound was running fine on my CentOS 5.3 box, in reality it was only doing half the job. Playing music was fine, but capturing sound from a microphone had never properly worked. Both "/usr/bin/system-config-soundcard" and "gnome-sound-properties" didn't show anything obvious (Autodetect for the three playback options and ALSA for the sound capture), but clicking the last test button didn't result in hearing the sound of the microphone on my headset.
Another way to test this is with:
# arecord -d 5 -f cd -t wav foobar.wav
# aplay foobar.wav
and in my case, I didn't hear anything while doing the playback.
It took lots of googling, but here is what you need to do. First of all, you can have the problem that your system has audio ports both on the front and the back of the system. For speakers or headsets you just plug it in anywhere and it works. Typically the front plug will disable what's plugged into the back. But for mics those two ports are not the same.
# /usr/bin/amixer
...
Simple mixer control 'Mic Select',0
  Capabilities: enum
  Items: 'Mic1' 'Mic2'
  Item0: 'Mic1'
...
On my system Mic1 was the input on the back of my PC, so I had to switch to Mic2 to use my headset that is plugged into the front. To change, use "/usr/bin/alsamixer", which opens a clumsy GUI, then click 'right' to get to "Mic Select" and use 'up'/'down' to change the Mic. Press 'Esc' to quit.
But that's not enough. Let's go back to our 'amixer' output.
# /usr/bin/amixer
...
Simple mixer control 'Mic',0
  Capabilities: pvolume pvolume-joined pswitch pswitch-joined cswitch cswitch-exclusive
  Capture exclusive group: 0
  Playback channels: Mono
  Capture channels: Front Left - Front Right
  Limits: Playback 0 - 31
  Mono: Playback 22 [71%] [-1.50dB] [on]
  Front Left: Capture [on]
  Front Right: Capture [on]
Simple mixer control 'Mic Boost (+20dB)',0
  Capabilities: pswitch pswitch-joined
  Playback channels: Mono
  Mono: Playback [on]
...
When I was running this the first time, it showed "Front Left/Right: Capture [off]". That's no good!! But how to change, because my alsamixer didn't show this as an option that can be changed. The following command will do the job:
# amixer sset Mic Capture cap
After that, maybe you should go back to alsamixer and switch the "Mic Boost" option on. You do that by moving right with the cursor and then press the 'M' key. Another option further right is "Mono Out", which can be 'Mic' or 'Mix'. I'm not 100% sure what it should be, I settled for 'Mix'.
Finally, while you're doing all this, you should keep your 'Volume Control' window open. For example, playing test sounds with the soundcard config tool will mute the microphone. And in other cases the level gets automagically :-) set back to zero. You better watch out.
This was for me just the prologue for installing Skype. The best way to do that successfully I found on this Hackery blog. Here is the summary.
# the skype binaries are 32-bit, so if you're running a 64-bit system, you
# need to make sure you have various 32-bit libraries installed in parallel
yum install glib2.i386 qt4.i386 zlib.i386 alsa-lib.i386 libX11.i386 \
  libXv.i386 libXScrnSaver.i386
# installing to /opt
cd /tmp
wget http://www.skype.com/go/getskype-linux-beta-static
cd /opt
tar jxvf /tmp/skype_static-2.1.0.47.tar.bz2
ln -s skype_static-2.1.0.47 skype
# setup some symlinks (the first is required for sounds to work)
ln -s /opt/skype /usr/share/skype
ln -s /opt/skype/skype /usr/bin/skype
Other good tips can be found on this CentOS HowTo webpage.
Posted at 02:13PM Apr 07, 2010 by WWWillem in Desktop |
Silence and Pavlov
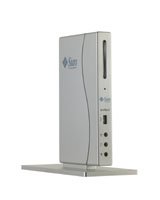
Today I got my SunRay@Home. For those of you not working at Sun, that's a Sun Ray attached to your home network that directly VPNs (from the firmware) into SWAN, the corporate network. It allows for hot-desking from your cubicle to your study and vice versa. Pretty cool stuff.
Reason I wanted to have one at home was mainly eco driven. When I do things like software development I need a full blown desktop. But in the morning, between alarm clock and shower, I'm only drinking my first coffee and checking my email. Why should I fire-up the big desktop to only use a browser and an email client. And that was my background to sign up for the SunRay@Home program.
I got my unit today, installation was a jiffy. Everything fine, Sun Ray on my left display, PC on the right LCD. Around 10 PM I decided to shutdown the desktop PC. And then came the big surprise: For the first time in many, many years (probably twenty) I was using again a computer with zero background noise. No, not just the "nearly silent" that laptops give you, but simply absolute nothing!! It was lovely, but at the same time even weird, I guess a kind of reverse Pavlov effect (in this case I got the food but there was no bell). It appears that browsing the web and the noise of fans are by now in our minds tightly intertwined.
I do use a Sun Ray in the office, but of course modern offices can't be called noiseless. I have to go back 15 years, when I used my trusty VT220 and a modem into the office, for the last time I worked with a computer that didn't make noise. And then 20-25 years back when my desktop system consisted of a 6502 based BBC-micro computer. That one also without fans, but you still had the rattling sound of the floppy drives. :-) For the rest, it seems I've always had fans around me when I was doing my computer stuff.
So, this SunRay@Home is a keeper. I can hear the wall clock ticking again. The only thing I need to do is to replace the green power LED of my SR2 with a blue or a white one. That green is too ugly with the brushed aluminum.
Posted at 10:30PM Jul 18, 2008 by WWWillem in Desktop |
Half Baked User Friendly
I guess since Windows 98 or so, it's the default in Explorer not to show you file extensions. Probably Microsoft hoped they could beat Apple in user-friendliness and thought that the icon would be good enough to show you the filetype. And maybe that would have been OK, if it had been implemented correctly (as a set of meta-data) like on my good-old NeXT.
It can't be that I'm the only one who completes every Windows install by: a) go to 'Folder Options' -> 'View' and unselect the 'Hide File Extensions', then b) take care that Explorer and the MS-DOS box are not hidden deep down in the 'Accessories', but are icons on the Desktop, part of the toolbar, and in the main of the Start menu. I guess I've done that now a hundred times. And it annoys me that with each and every newer Windows version, this stupid UI design is still there.
Tonight, this whole thing went a step further, and even more bizar. On a latest-greatest Windows Mobile phone, an application failed and wrote its results to a logfile (let's call it abc-xyz) in the root directory. I tried to open the file by double clicking it, but I got a pop-up that I had to open the application first and then open the file. OK, so I started 'Mobile Word', clicked 'Menu', then 'File' and found a wide range of options (like New, Save, etc.) but not 'Open'. Duh ....
In the options screen I discovered that there is a feature to select what types of files Word Mobile will show me, which even includes 'All Known FileTypes'. Mmmm, that sounded good, but still no luck. Finally I discovered that my file was in reality called abc-xyz.log, but the extension was, as explained above, not shown and secondly a .log file is appearently not a "known filetype" for Windows Mobile. When downsizing Explorer to the Mobile platform, it seems they had to drop the option 'Show All Files'. As if there is not enough memory for all the other bloatware.
But OK, I got closer to a solution. Let's simply rename the file to 'abc-xyz.txt', or even '.doc' and then all will be fine. Ehhh, not so!! Word still couldn't see the file. That was when I discovered that the rename in Explorer had rebaptized my file into 'abc-xyz.txt.log'. Which makes sense when you keep the .log part hidden, but it is absolute BS if the result is that you can't open a simple log file anymore. All in the sake of user friendliness.
You start to wonder how much usability testing has been done on a feature like this. And even more what audience the Windows developers had invited for these sessions. It's my guess that these were not a group of power-users and that the software developers were thinking that if the UI was good enough for them, it would be more than good enough for more sophisticated people. WRONG!!!
Long story short, in the end the only way to open my logfile in any application was to copy it from the phone to my desktop and use some editor to open the file and see its five lines of content.
Posted at 08:33PM Jun 28, 2007 by WWWillem in Desktop |
External Display at Boot
My notebook — a Fujitsu P7010D — is light and small, therefore, when not on the road, I use it with an external display and keyboard. Solaris 10 being my main OS, some careful timing is needed for when to press the Fn-F10 key while booting. It has to happen when X-Windows hasn't started yet. The display of the grub boot menu is always a good moment.
However, couple of days ago I discovered another method. I guess it's also valid for other notebooks and although I didn't test it yet, this little trick should work the same way when you run Linux. This is what I do: First of all connect all external devices, then open the laptop, press the power button, and now immediately close the laptop again. Result is that the BIOS detects this and will select the external display straight away. No need to press any function key anymore.
Posted at 05:33PM Jun 17, 2007 by WWWillem in Desktop |
Xinerama
Last weekend I was installing a Xinerama system using a Matrox G450 dual-head card. Hey, $15 at TigerDirect, what do you want more. But it's not the price that this topic is about, it's probably even not Xinerama that it's about. When you install a dual-screen system – doesn't matter if it's Windows, Linux or Solaris based – you simply get a display twice as wide, with the result that among all other problems the pop-up window appears in the center. Oops, that center is where you have those two chunks of beige plastic, which is called the case of your monitor :-).
In some situations this concept of an extra-wide screen is maybe useful, but IMHO in most it is not very apropriate. I've noticed that more recent Xinerama versions have become more intelligent when it comes to pop-up's, but still I think that taking two screens as just a single extra-wide one is not the right choice.
Let's take a step back. Having a second display is not so much having a bigger screen, but much more similar to the multi-window feature X-Windows display managers have since a couple of years. It's also more like what in the old days you could do on a 80x24 display with Alt-F1, F2, F3 or F4, just switching from one screen to other. I think it is even very similar to what a tabbed browser like Mozilla / FireFox provides you. So yes, it is a second screen, but that doesn't automagically make it into a wider screen.
Now I know that I can solve the "popup in the middle" problem by having a third screen, or maybe five <g>. The popup then again appears centered, but that's beyond the point. Many desktop users like multiple screens, but most don't use them as one large canvas. It's most often something like "let's keep my email open on the right, while I keep working on the main screen". Notice the phrase "main screen"!! It's time to have an alternative to Xinerama, very similar to the multi display feature in X-Windows, controlled by the bar/panel at the bottom. I think the display needs to be more distinct, the mouse will not move "out of bounds", but still you can drag a window to another display.
For me, that would be a much more natural user interface. And maybe it does exist already (most things do :-) and I just haven't found out how to configure it in X-Windows. If not, it's probably time for me to start a little X-Windows hacking project ... ehhh, probably not so 'little'.
Posted at 11:43PM May 25, 2006 by WWWillem in Desktop |
NVIDIA nForce 3 Ethernet
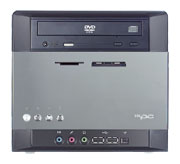
At home, I'm using those little black Shuttle SN85G4 systems. One as my desktop and one as a MythTV project under way, which has to be ready by the time the soccer championship hits us in June. These Shuttles are running AMD64 (socket 754, no Opteron's :-). They're small, pretty silent and because Shuttle is coming up with new stuff, you get them pretty cheap, if you're still able to find them.
This weekend I was installing Solaris 10 and stumbled on the nForce 3 chipset not being supported. Also no download available from NVIDIA (for Linux yes, not for Solaris). That gives you a system with no working NIC, and that's no good. Checking the HCL, they clearly took the "easy way out" by installing a separate PCI network card, by-passing the onboard NIC.
A little browsing brought me to Masa Murayama's website which brings a whole set of unusual and therefore so useful NIC drivers. Among those, one called "nfo" for the nForce chipset. Masa labels the driver alpha-code, but I've had no problems. If you're going to use this driver, here are some tips. The tarball contains the source, but also ready-to-go modules for i386 and amd64. You can try to build, but if possible, better don't. Forget about "make", jump straight to "make install". I'm saying this, because building with gcc needed a little hacking and compiling with Studio 11 wasn't successful at all.
Next, follow his README carefully. It includes an "install", then an "uninstall" and then again an "install". This sounds weird, but if you follow it strictly, it all works. If you try to make shortcuts, like I did :-), you better know what you're doing, I didn't :-).
I stumbled on one problem. Part of the install is running a script called "adddrv.sh". In my case that gave a message about a library already being installed. I took that as a warning, but it really was an error. You have to solve that (by commenting out a line in the script, in my case two lines) before you can continue. If you ignore it, you're in trouble, it won't work.
When I later emailed about this with Masa Murayama, he mentioned that the likely cause was an nForce GbE driver recently added to Solaris. I guess he is right about that, but for me he is "1 - 0" ahead of the game (we're back to soccer here :), because the standard install didn't give me any networking at all and his "nfo" driver is doing fine.
Posted at 11:52AM May 09, 2006 by WWWillem in Desktop |
Sun Desktop Manager
May 1st, Labour Day. Isn't that a nice date for my first article on BigAdmin. A small part of today's Network Computing Event, was the release of Sun Ray Software 4. Which includes Sun Desktop Manager 1.0, formerly aka APOC. The latter originated in Sun's JDS on Linux, but the current SDTM is targeting SunRay and Secure Global Desktop.
With Sun Desktop Manager you can store and manage the configuration of a user's desktop (his Gnome preferences, his proxy server, his Mozilla's home-page) in a central directory. The cool thing about this is that because a directory has an hierarchical structure, you can enter these settings not just for the individual, but for whole departments at a time. Or the hierarchy can be based on your network topology, or even both. Desktop Manager will also allow you to lock down desktops by disabling entries in the Gnome start-menu.
I could go on and on about the cool features of this system, but that's not the topic. In the last two years I helped quite some customers with setting up POC's. A stumbling block for many of them was always the lack of knowledge on how to configure the LDAP server. The folks that created SDTM always assumed that people would know that, but working in the field you realize quickly that that isn't always the case. I did some beta-testing of SDTM 1.0 and converted my ldif files from the old APOC to the new SDTM. And then decided to "finally" figure out how this could be done without some magic ldif files, but just with the available Directory Server console tools.
While doing so, I captured screenshots and glued the whole thing together into a step-by-step guide on how to set this up. And that resulted in this BidAdmin Feature Article with the name "Sun Desktop Manager Tutorial". It will be referenced from the SDTM product documentation, when that's released on May 16th.
Posted at 10:25AM May 02, 2006 by WWWillem in Desktop |
Projectors and Xorg
Recently, setting up at a customer site, I had problems hooking up my notebook, running Solaris 10, to the video projector. Not the best timing of course. :-) Playing around with this lateron, I discovered the following. If the function key to switch video (F5, F10, whatever it is on your laptop) doesn't work to switch from LCD to projector, there is a trick.
Logout, and with the Solaris 10 login screen in front of you press <ctrl><alt><backspace>. This restarts the X-Windows server. While it is doing this (so immediately after your three-finger salute) press <Fn><F10>. The trick seems to be that switching video only works when the X-Server is not running.
It will depend on your notebook of course, but it is my experience that where Windows normally allows you three video modes – LCD, external or both – with X-Windows it is either one or the other. However, this could be because my LCD is a 16:9 widescreen afair, while the video projector (or monitor) is the traditional 4:3.
Now we're on this subject: If you create an xorg.conf file with "/usr/X11/bin/Xorg -config", you better add (manually) to the Monitor section some "HorizSync 20-80" and "VertRefresh 50-90" entries. If you don't, Xorg will use the default modes, which are only good for 640x480. This is not specific for notebooks, in the past I noticed the same on a V40z.
Posted at 12:12PM Apr 30, 2006 by WWWillem in Desktop |
Serial on Ultra 20
Like so many PCs today, the Sun Ultra 20 workstation doesn't come with "legacy" ports. No serial or parallel anymore, it's all USB. And for some that's a problem, like when you need to connect serial matrix printers for receipts, invoices, etc.
The Ultra 20 is based on a Tyan S2865 motherboard. But with some modifications: the COM1 port has been removed completely (although the solderpins are still there) and COM2 is only a 10 pin header.
Trying to use the COM2 port failed at first, because by default all legacy ports are disabled in the BIOS. To fix this press F2 while booting, go to the "Integrated Peripherals", select "Onboard Serial Port 2" menu and enable the port. You can leave the IO and IRQ as default (2F8 / IRQ3). Finally leave the BIOS by choosing "Save & Exit Setup".
Now you need a cable and a bracket with a DB9 connector. You can do this two ways. You can probably avoid a lot of trouble by buying this from Cables To Go. I didn't test it myself, but these seem to be the right type. If you want to go the DIY route, you must be careful. On many serial or serial/parallel I/O boards, the DB9 plugs on the bracket are connected to the PCB header, according to the right side of the diagram.
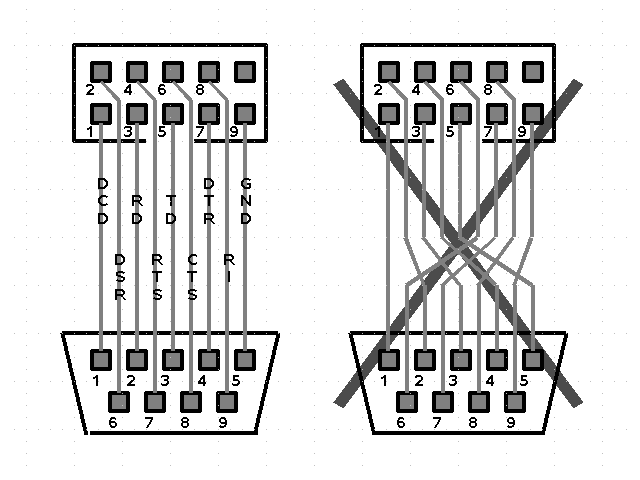
click to enlarge
The wiring on the left shows how it must be. If you would use a cramp-on DB-9 plug you're automagically good-to-go. Hoever all the cables on serial/parallel boards follow a strict 1-1, 2-2, 3-3 to 9-9 wiring, while it needs to be 1-1, 2-6, 3-2, 4-7, etc. The reason is clear when you look how a header plug is numbered differently from a DB-9 plug.
OK, long story, but knowing the solution, it's all pretty simple. Use a cramp-on DB-9 (male !!), 30 cm of flatcable, find in your junk box a bracket with a hole for the DB-9 or buy one on eBay and off-you-go.
Posted at 10:47PM Apr 21, 2006 by WWWillem in Desktop |